
Tech News
Mastering the Setup: A Guide to Setting up Your New iPhone or iPad

Were you fortunate enough to receive the gift you desired from Santa this year?
If a new iPhone or iPad was waiting for you under the Christmas tree, then the answer is most likely a resounding ‘yes’.
However, as you probably know, there are a few steps you need to follow to set up your new device before you can start using it. Taking your time during this process is crucial to avoid any issues later on.
For the purposes of this guide, we will be focusing on setting up an iPhone Air. Nevertheless, the steps should be similar for any device running iOS 26 or iPadOS 26.
If you received an Android device instead, we have a separate guide on setting up a new Android phone.
How to set up a new iPhone or iPad
Power on your iPhone or iPad and select your language and region
Anyron Copeman / Foundry
To begin, press and hold the power button on your iPhone or iPad (usually located on the right side or top of the device) until the Apple logo appears.
Swipe up from the bottom of the screen to select your language. If you have chosen English or another language with multiple variations, you will then be prompted to choose your region.
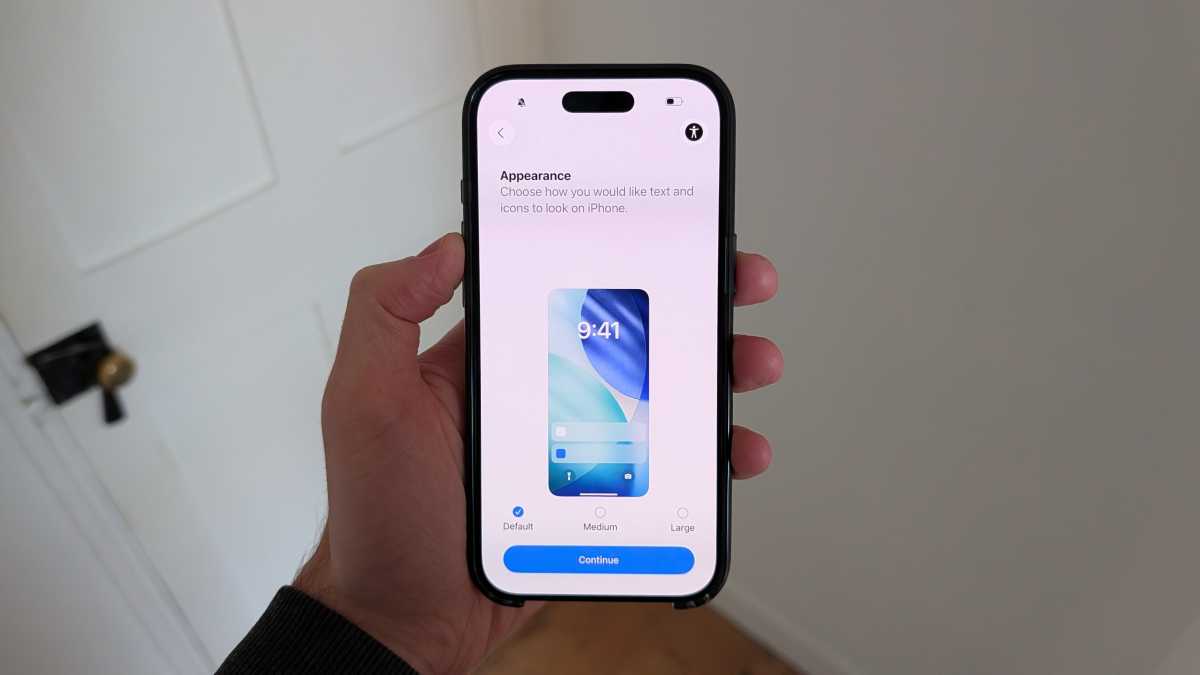
Customize text and icon sizes
Anyron Copeman / Foundry
You will have the option to choose the size of text and icons on your device. Choose from ‘Default’, ‘Medium’, or ‘Large’, and each option will be previewed when selected.
Once you have found a setting that suits you, tap ‘Continue’ to proceed.
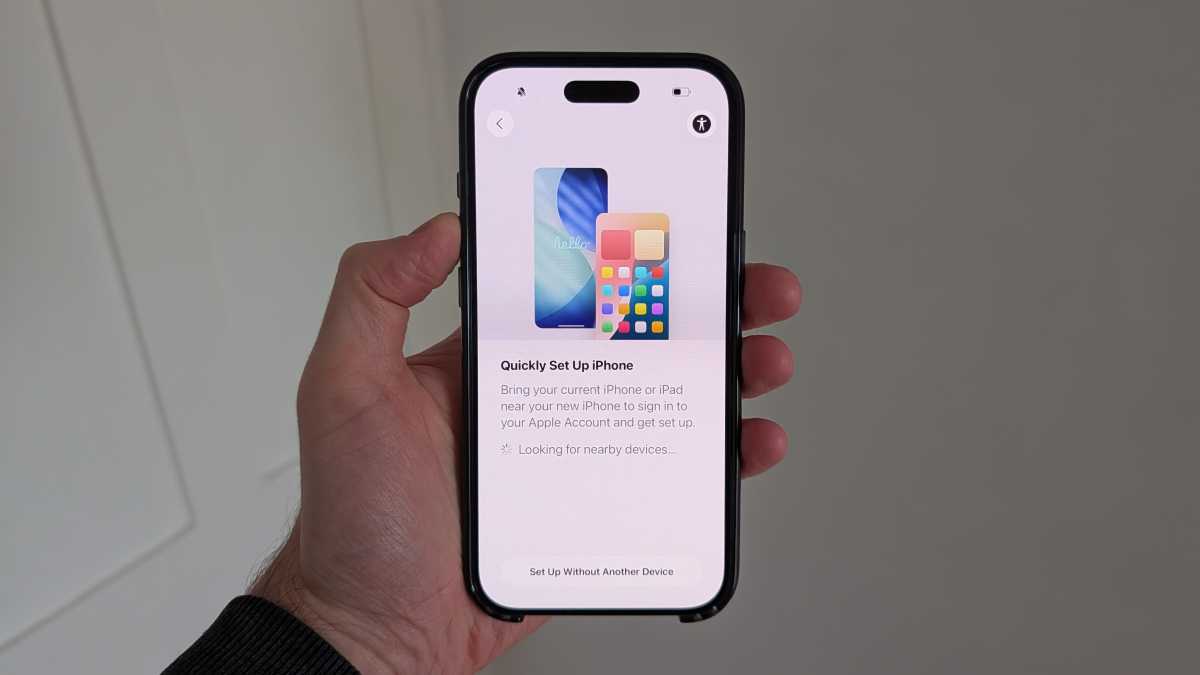
Set up using your previous iPhone or iPad
Anyron Copeman / Foundry
If you have a previous iPhone or iPad, you can use it to quickly restore settings and data. Simply turn it on and place it near your new device, and Apple will take care of the rest.
However, if you do not have another Apple device or prefer to start fresh, just tap ‘Set Up Without Another Device’ instead. In the following steps, we will assume this is the case, but you may be able to skip some steps if you have chosen the other route.
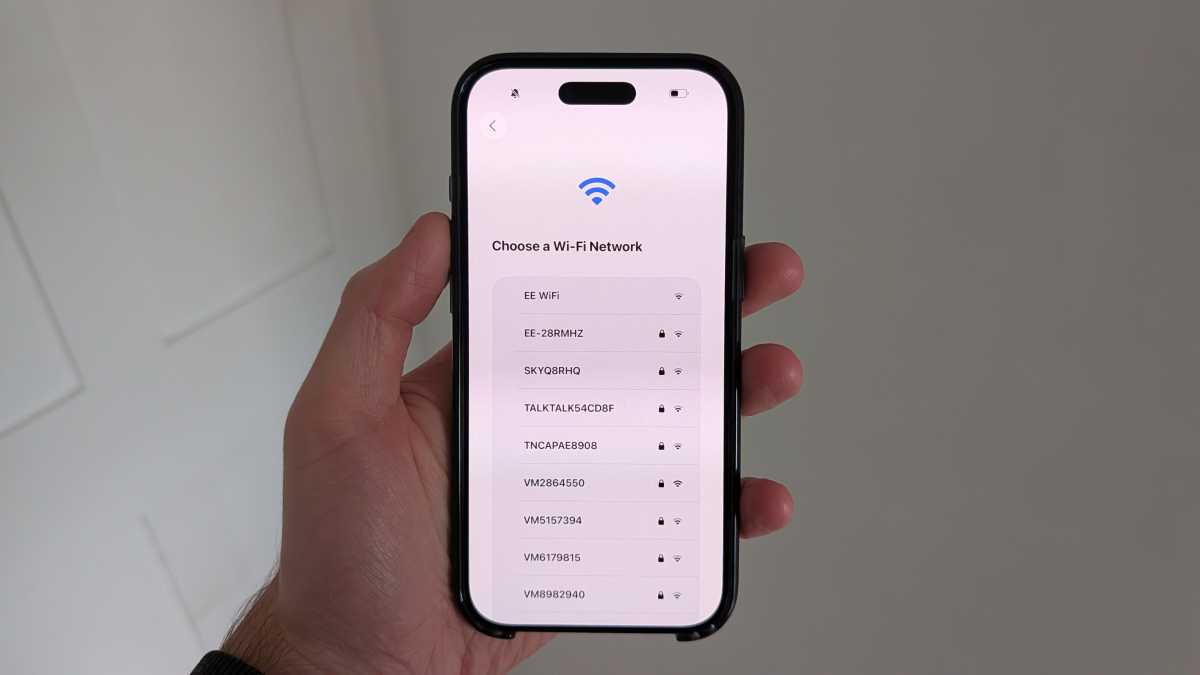
Select a Wi-Fi network
Anyron Copeman / Foundry
Your device will display a list of nearby Wi-Fi networks. Simply select the one you want to use and enter the password.
If you have already inserted a physical SIM card or activated an eSIM, you can also choose to set up using mobile data. In this case, you can select ‘Continue Without Wi-Fi’.
Having an internet connection makes the setup process much smoother.
Choose who the device is intended for

Anyron Copeman / Foundry
After acknowledging Apple’s ‘Data & Privacy’ information, your next step is to select who the device is intended for. You have the options of a Child (12 years or younger), Teen (13 to 17), or Adult (18 or older).
If you choose either of the first two options, you will be asked to connect it to a Family account, allowing a parent or guardian to manage their screen time.
For this tutorial, we will set it up for an adult.


Cyber Warfare: The Battlefront of the Digital Age

Monster Hunter Stories 3: The Challenge of Twisted Reflection

Revolutionizing Cash-Pay Clinic Prescribing: VITL Secures $7.5M Amid GLP-1 Boom

Balancing Act: The Decision to Shut Down Sora

Exclusive Arrival: Cupra Born VZ Lands in Australia – But There’s a Twist!

iPhone 12 Pro Max vs Samsung Note 20 Ultra / Huawei Mate 40 Pro Camera Test Comparison.

ClickFix: The New Threat to macOS Security

Kingdom Come: Deliverance 2 – The Rise of Artificial Intelligence

Elon Musk’s Latest Venture Faces Uncertainty as Last Co-Founder Departs xAI

EU Takes Action Against Instagram and Facebook for Violating Illegal Content Rules

Warning: Facebook Creators Face Monetization Loss for Stealing and Reposting Videos
Facebook Compliance: ICE-tracking Page Removed After US Government Intervention

Facebook’s New Look: A Blend of Instagram’s Style

Facebook and Instagram to Reduce Personalized Ads for European Users

InstaDub: Meta’s AI Translation Tool for Instagram Videos

Reclaim Your Account: Facebook and Instagram Launch New Hub for Account Recovery

Meta discontinues Messenger apps for Windows and macOS

Breaking Updates: Meta Connect 2025 Unveils Latest Developments
iPhone 12 Pro Max vs Samsung Note 20 Ultra / Huawei Mate 40 Pro Camera Test Comparison.

iPhone 12 Pro Max vs Samsung Note 20 Ultra / Huawei / Xiaomi / OnePlus Battery Life DRAIN Test.

The BEST Smartphone of 2020 🏆

The Self-Healing Smartphones!

Apple is not what it used to be.

Smartphones are Boring now.

The Fastest Android Phone Ever.

Unboxing the $122,000 Smartphone. 🤯

Are Linux Smartphones about to KILL Android?
-
 Facebook5 months ago
EU Takes Action Against Instagram and Facebook for Violating Illegal Content Rules
-
 Facebook5 months ago
Warning: Facebook Creators Face Monetization Loss for Stealing and Reposting Videos
-

 Facebook5 months ago
Facebook Compliance: ICE-tracking Page Removed After US Government Intervention
-
 Facebook4 months ago
Facebook’s New Look: A Blend of Instagram’s Style
-
 Facebook4 months ago
Facebook and Instagram to Reduce Personalized Ads for European Users
-
 Facebook6 months ago
InstaDub: Meta’s AI Translation Tool for Instagram Videos
-
 Facebook4 months ago
Reclaim Your Account: Facebook and Instagram Launch New Hub for Account Recovery
-
 Apple5 months ago
Meta discontinues Messenger apps for Windows and macOS

Newsletter Signup
Subscribe to our weekly newsletter below and never miss the latest News or an exclusive offer.