
Mobile Tech
Mastering Video Sound Repair: A Step-by-Step Guide

For individuals who enjoy capturing videos with their iPhone, the significance of sound quality cannot be overstated. Whether you are striving for the perfect shot for your personal project or simply want to share a high-quality video of your pets with loved ones, ensuring excellent audio is crucial.
Fortunately, with an iPhone 16 or newer model — including the latest iPhone 17e — enhancing the audio quality of your videos is a quick and simple process. These newer models enable your iPhone to capture audio in multiple streams simultaneously when recording a video. This feature allows you to adjust the audio afterwards, focusing on voices and eliminating background noise. Here’s a guide on how to utilize this feature.
Understanding the iPhone’s Audio Mix Feature
By default, your iPhone records videos with Spatial Audio, a 3D audio format that offers a more immersive listening experience.
While your iPhone automatically selects the audio mix when using Cinematic mode, you can utilize the Audio Mix function in the Photos app post-recording to customize the audio quality according to your preferences.
Spatial Audio is typically activated by default on supported iPhones — including all iPhone 16 and iPhone 17 models, such as the 16e, 17e, and iPhone Air — but you can verify this and manually enable it by following these steps:
- Access the Settings app.
- Scroll down and navigate to Camera.
- Select Record Sound.
- Ensure that Spatial Audio is chosen.
Once done, you are now prepared to record videos with superior 3D audio quality.
Changing the Sound of Your iPhone Videos
After recording a video with Spatial Audio, you can head to the Photos app to adjust the audio quality using the available options:
- Launch the Photos app.
- Open the video you wish to edit.
- Tap the Edit button located at the bottom of the screen.
- Select Audio Mix at the bottom of the screen.
- Swipe left and choose your desired audio option.
- You can also adjust the slider beneath the mix options to increase or decrease background noise in the video.
- Once satisfied, tap Done in the top right corner of the screen.
You can experiment with the various audio settings to observe the differences, but here is a brief overview of each:
- Standard: Retains the original audio recorded.
- In-Frame: Diminishes sounds and voices from sources outside the video frame.
- Studio: Reduces background noise and reverb, providing a more professional studio-like sound.
- Cinematic: Places all voices on a front-facing track while maintaining environmental noises in a surround sound format, akin to a theatrical mix.
Enhancing Sound Quality in iPhone Videos
By following these steps, you can elevate your iPhone videos to a cinematic level and imbue them with a professional touch effortlessly.
While aspiring filmmakers and professionals may require additional tools to create high-quality movies, adjusting the Spatial Audio settings on your iPhone is ideal for most individuals seeking to share pro-quality videos with friends and family.
global $wp;
. ‘/’;
??>


Mastering Video Sound Repair: A Step-by-Step Guide

Unveiling the American Dream: The Ferrari F80 Makes its US Debut

Can you ACTUALLY trust Mrwhosetheboss?

Security Breach: AppsFlyer Web SDK Compromised by Crypto-Stealing JavaScript Malware

Berlin Tower Secures €5.5 Million Funding to Revolutionize Last-Mile Data Engineering in the AI Age

Uncovering the Impact of the US Military Ban on Claude AI Users

Rumor Mill: BMW’s M3 GT3 Touring Set to Conquer the Nürburgring 24H

Microsoft Releases Emergency Hotpatch for Windows 11 to Address Critical RRAS RCE Vulnerability

April Showers Bring Piggy Power: The Adorable Adventures Begin

EU Takes Action Against Instagram and Facebook for Violating Illegal Content Rules

Warning: Facebook Creators Face Monetization Loss for Stealing and Reposting Videos
Facebook Compliance: ICE-tracking Page Removed After US Government Intervention

Facebook’s New Look: A Blend of Instagram’s Style

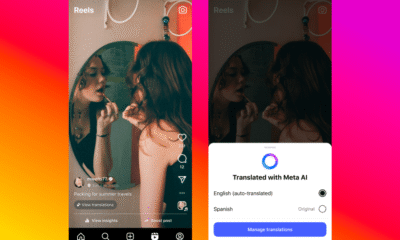
InstaDub: Meta’s AI Translation Tool for Instagram Videos

Facebook and Instagram to Reduce Personalized Ads for European Users

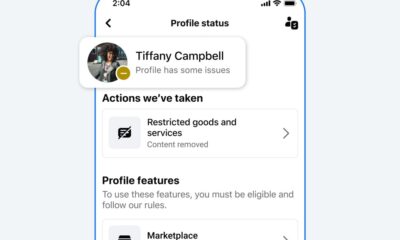
Reclaim Your Account: Facebook and Instagram Launch New Hub for Account Recovery

Meta discontinues Messenger apps for Windows and macOS

Breaking Updates: Meta Connect 2025 Unveils Latest Developments
Can you ACTUALLY trust Mrwhosetheboss?

A Fascinating Smartphone Gadget – Insta 360 GO 2 😈

ROG Phone 5 Ultimate Unboxing – So Fast it’s Funny.

Oppo Find X3 Pro Review – wait WHAT!?

if smartphone commercials were EXTREMELY honest.

OnePlus 9 & 9 Pro REVIEW

OnePlus 9 Pro vs Samsung S21 Ultra Camera Test Comparison.

Vivo X60 Pro Plus – This is getting Ridiculous! 😂

The Thinnest Smartphone in the World.
-
 Facebook5 months ago
EU Takes Action Against Instagram and Facebook for Violating Illegal Content Rules
-
 Facebook5 months ago
Warning: Facebook Creators Face Monetization Loss for Stealing and Reposting Videos
-

 Facebook5 months ago
Facebook Compliance: ICE-tracking Page Removed After US Government Intervention
-
 Facebook3 months ago
Facebook’s New Look: A Blend of Instagram’s Style
-
 Facebook5 months ago
InstaDub: Meta’s AI Translation Tool for Instagram Videos
-
 Facebook3 months ago
Facebook and Instagram to Reduce Personalized Ads for European Users
-
 Facebook3 months ago
Reclaim Your Account: Facebook and Instagram Launch New Hub for Account Recovery
-
 Apple5 months ago
Meta discontinues Messenger apps for Windows and macOS